February 2015 | Crafting Connections
Receive tips, freebies, and resource updates when you subscribe to my newsletter!

Sequencing Anchor Chart

Monday, February 23, 2015

A few years ago during a PLC meeting, our third grade team did an item analysis on a practice test that our third graders had taken a week earlier. Do you care to know which questions were missed most frequently? Main idea, vocabulary, & sequencing!

The first two topics did not surprise me, but sequencing sure did!  Isn't sequencing a "right there" type question?? As long as students take the time to look back at the passage, the answer can be found, right? So I took a look at the questions... and noticed that they included the words just before and after. I also talked with my students (mainly ELL), and they repeatedly said "I always get those two words [before & after] mixed up."

That surprised me... until I thought about my own challenges with speaking Spanish, and how I often confuse antes (before) and despues (after) when I speak Spanish! To make things particularly challenging for our Spanish-speaking ELLs, antes looks remarkably similar to after, but it means before.  

As we all know, graphic organizers are powerful tools for ELLs, so I used an anchor chart and created a graphic organizer while students copied it on their own paper. It looked like the one I used on the anchor chart below. I also found some sequence-friendly informational reading passages and wrote some multiple choice sequence questions. We drew the graphic organizer beside each question and then wrote inside it as we worked through the question and determined the correct answer.


Sequencing Anchor chart- Check out this blog post for a free minilesson you can use to help prepare your students for sequencing questions on standardized tests.

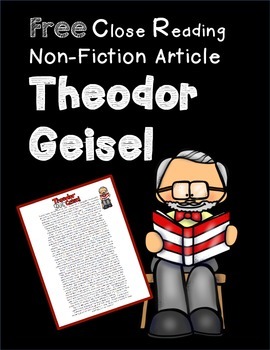
For the anchor chart above, I created the questions after reading this FREE nonfiction passage about Theodor Seuss Geisel by Panicked Teacher (created just in time for Read Across America Day!)

When using this anchor chart in the future, I will draw the graphic organizer at the top and write the test questions below it prior to the beginning of class. During class, I will model how to work through question #1 by underlining the words just before, thinking aloud, drawing the graphic organizer, and finally plugging the answer choices in where they belong on the arrow I drew.

Then, I will give students an opportunity to complete #2 independently, by drawing their own graphic organizer like I did with the previous question. After a few minutes, I will ask a student to walk me what I should draw to correctly answer this question.

If you are looking for more upper elementary test prep activities that focus on sequencing, you might want to take a peek at the following options, available in my TpT store!

Sequencing PowerPoint for Reading Comprehension- This PowerPoint is great for test prep, as it includes many multiple choice questions.


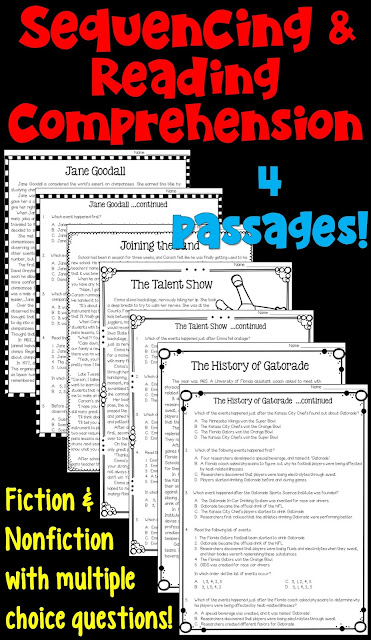
Sequencing and Reading Comprehension- this packet of worksheets is designed for upper elementary test prep.


Do you have any other tricks for helping students remember the meanings of before and after?

~Deb

Grouping Students for Literature Circles

Wednesday, February 18, 2015
Clip art by A Little Peace of Africa (Laine Sutherland).

Hello, friends!  Today I wrote a blog post at Upper Elementary Snapshots about my favorite books to use for upper elementary literature circles.  If you haven't read that post, hop over there to check it out!

After you've selected books for literature circles, one of the next tasks to be done is deciding how you will group your students.  In a perfect world, we would like our students to be able to choose which book most interests them, and then choose that literature circle.  But... we know that it doesn't work that way in the real world!  You often have a limited number of book copies, groups of 16 typically aren't overly productive at this age, and there is the issue of "conflicting personalities".  What's the next best method?  A mixture of self-selection and teacher placement is what has worked for me!

Step 1: Present riveting book "commercials".  I have found that this is of key importance.  I try my absolute best to talk each and every book up so that it appears to be my favorite book of all time!  If I do this correctly, I'll hear students say "I just can't decide what my first choice should be!" or "I don't really care which book I read- they all look good!"

An Example Book Commercial for My Life as a Fifth Grade Comedian by Elizabeth Levy
Bobby is the class clown, and is known for making everybody laugh.  Most of his classmates have no idea the problems Bobby is facing at home- his older brother has been kicked out of the house and his parents are threatening to send him to a special school for kids with behavioral problems.  Another really cool feature about this book is that every single chapter begins with a joke (share an example).  If you like to laugh, you want to learn new jokes, and you like a book with some unexpected twists, then this is a book that you will definitely want to read!  

Step 2: Allow time for students to preview the books.  After the book commercials, I lay the books on a counter and tell students to take a few moments later to page through the books to take a closer look at them and decide if they "feel" right... whether they might be too difficult, too easy, or just right.  This step is mainly provided for the struggling readers in each classroom.  It is my hope that they will recognize which books might lead to frustration, and avoid requesting those books.  (Since this process takes place before the literature circles begin, students have time to look through the books while the teachers are meeting with their normal small groups.)

Step 3: Have students complete a form.  Next, students are given a book selection form.  They simply write their name at the top and list their first choice through their last choice, in order.  (I write the titles on the board so they can easily copy them on their form.)

Step 4: Select the groups.  Finally... the fun task of grouping the students arrives.  I try really hard to make sure that students get one of their top three choices (out of five).  Surprisingly, it usually works out that students even get one of their top two choices!  I usually look at my struggling readers' forms first, and place them in a group.  Five to six students are placed in each group.  I try to mix the groups between girls and boys, but there have been times I had an all-girl group (Nothing's Fair in Fifth Grade).  The groups are kept fairly even, but sometimes a popular choice ends up having six readers, while another book only has four readers.

Are you wondering whether those struggling readers keep up when they are reading books that are often significantly above their independent reading level?  (That was my main concern with literature circles before I facilitated them myself.)  Most of the time, they did quite well.  They appeared to really enjoy participating in a heterogeneous group other than their normal day-to-day guided reading group.  I tried to set them up for success by using the following schedule:


Literature Circles (45 minutes total)
15-25 minutes- Book Discussion 
20-30 minutes- Read and prepare for the next day's discussion

During the last 20-30 minutes, I allowed students to decide for themselves whether they wanted to read the next day's assignment as a group, with a partner, or independently.  Struggling readers almost always chose to read with a partner or with the entire group.  Because of this arrangement, they were able to complete the reading faster (and therefore keep up with the group) and often with a higher level of comprehension than they would have had they been required to read independently.  

Thanks for visiting today!  I would love to hear about your experience facilitating literature circles in your upper elementary classroom!  (Don't forget to hop over to Upper Elementary Snapshots to view some of my favorite literature circle titles!)


Italics Anchor Chart: Improving Reading Fluency

Monday, February 16, 2015
Do you remember learning how to read words in italics? I sure don't! I think I figured it out on my own at some point.

One thing I do remember is my first year as a reading teacher. I was assigned to work in fourth and fifth grade classrooms, and I began the year with administering Benchmark assessments to each and every fourth and fifth grader.  It was eye-opening, and by the time the last Benchmark was given, I was beyond excited to start teaching guided reading lessons based on what I observed during the Benchmark assessments.  


I was surprised to discover that one reading behavior in which the majority of fourth and fifth graders needed direct instruction was a lesson on how to read words written in italics! During the Benchmarks, most students plowed through words in italics with no change in intonation whatsoever. 

Reading words in italics! Use this anchor chart that uses identical sentences that only differ in which word is italicized. As students stress the various italicized words, they will realize the subtle shift in meaning that occurs.


How did I teach this lesson?  With an anchor chart, of course! :)  At the beginning of the lesson, the thought bubbles are not on the anchor chart.  I begin by telling students that when they see a word in italics, they need to stress that word, or say it with a little more force than the surrounding words.  Then we practice reading the sentences at the top of the anchor chart with the correct intonation of italicized words.  

Next, I ask my students to infer why authors write words in italics.  I help them come to the conclusion that authors use italics to help us readers comprehend what they or their characters are thinking.  Furthermore, the same can be said for us!  When we speak, we stress certain words in hopes that the listener will know exactly what we mean when we say something!

We return our focus to the anchor chart, and I have my students help me determine the exact meaning the speaker is trying to convey in each of the top four sentences.  This is when I add the thought bubbles, based on our conversations.

The lesson concludes after students have had an opportunity to practice reading aloud the sentences at the bottom of the anchor chart.  This lesson doesn't totally and immediately erase of the problem of students ignoring italics, but it seems to be a good start!

If you are interested in providing your students with another practice opportunity, feel free to check out my italics strips, available in my TpT store.  I have strips for each hundred set of Fry words, 1 - 1,000 so that there are sets available for all elementary grade levels.

Italics Strips to promote reading fluency! This resource features 100 words from Fry's common word list.


Italics Strips to promote reading fluency! This resource features 100 words from Fry's common word list.


Italics Strips to promote reading fluency! This resource features 100 words from Fry's common word list.


~Deb

Analogies Anchor Chart {plus a freebie}

Monday, February 9, 2015
I love today's topic- teaching students the various types of analogies! I still remember having to take the Miller's Analogy Test before being accepted into my graduate school program.  Have you ever taken the test? I actually enjoyed it!  In my opinion, analogies are like puzzles!

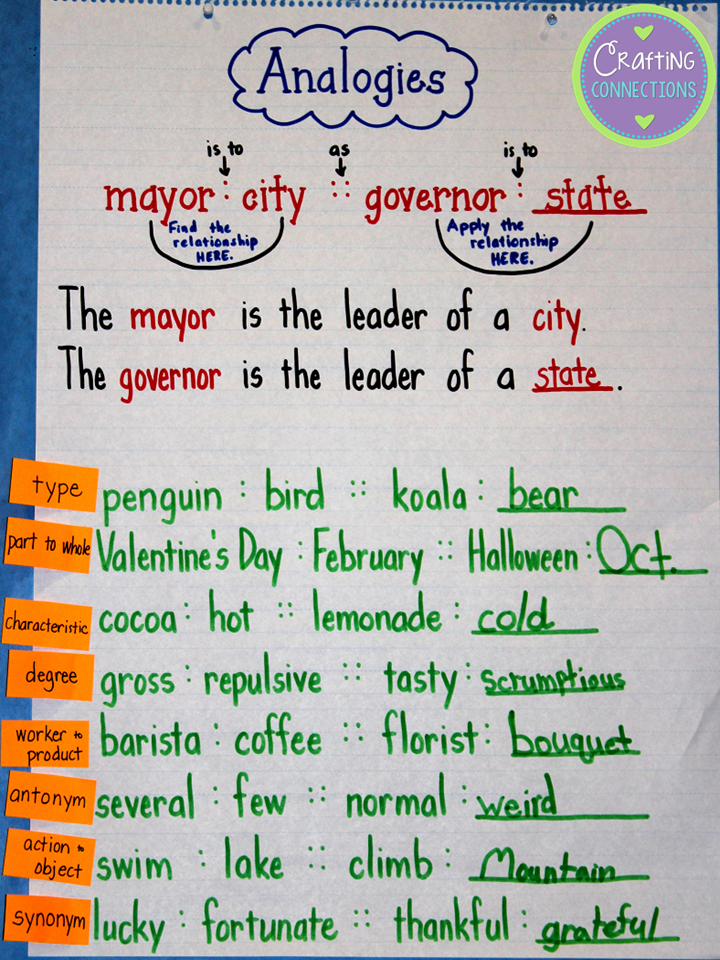
Prior to class, my analogy anchor chart looks like this:  
Teach students about the many different types of analogies with this student-friendly anchor chart!

We begin by looking at the top half of the anchor chart and discussing how to read an analogy and determine the missing word in the analogy.

Next, we work together to complete the analogies.  We discuss how there are sometimes more than one word that can complete the analogy. For example, in gross : repulsive :: tasty : ___, multiple words could be written in the blank (delicious, delectable, etc.), and they would all make sense.


Teach students about the many different types of analogies with this student-friendly anchor chart!


Finally, we classify the analogies.  I pass out sticky notes with analogy types written on them (see below). Usually, about three students "share" a sticky note. After giving them about two minutes to discuss in their small groups where their sticky note belongs on the anchor chart, students take turns bringing their sticky note to the anchor chart and explaining their thinking.  

Teach students about the many different types of analogies with this student-friendly anchor chart!

Click on the image below to download this FREE practice worksheet that is part of my new analogy bundle.


Also, check out my blog post from last Friday to read about two of my favorite analogy activities to do with upper elementary students.  

If you are looking for more teaching resources for analogies, feel free to check out my analogies PowerPoint!
Analogies PowerPoint- includes 46 slides (over 30 practice slides: fill-in-the-blank & multiple choice format)


~Deb

Analogies: Two Engaging Activities

Thursday, February 5, 2015


This week has been all about analogies for me.  I created a few new analogy resources (if you are interested, you can check them out here), and I found myself recalling two of my favorite analogy activities that I used to do with fifth graders.  


Activity #1- Picture This!
As an ESL co-teacher, it probably comes as no surprise that I'm all about visuals to accompany written words.   Therefore, we did this activity fairly early in our study of analogies.  Once students were first introduced to analogies through a PowerPoint, this was the second activity that we did.

I gave each student a sheet of white paper and told them to fold it in half (hamburger-style).  Next, I instructed them to open their paper, trace the fold line with their pencil, and then draw two diagonal lines: one from the bottom left corner of the sheet to the top of the fold, and the other from the bottom of the fold to the top right corner of the sheet.

I then instructed my students to write an analogy at the bottom of the paper, and then illustrate it using the spaces above.  This was my sample:
My fifth graders always loved this activity, and I really enjoyed seeing how creative they could be.  They often wrote analogies that I never would have thought of, and they were always eager to share their creativity with their classmates!  (I really wish that I would have snapped some photos of their work, but this was an activity I did before my blogging days began.)


Activity #2:  Sticky Analogies
Sticky notes make everything more fun, right?  Another favorite activity began when I wrote the beginning of six analogies on sheets of brightly-colored paper.  One by one I showed students the analogy starters, and I asked them to help me determine which type of analogy was started (synonym, antonym, part to whole, etc).  Using magnets, I hung the sheets across the board at the front of the room.


I then gave each student three sticky notes.  They had to cut the sticky notes in half, and then finish as many analogies as possible in the six minutes I gave them.  


At the end of the six minutes, there were sticky notes covering the papers and spilling onto the board.  After the timer sounded, we quickly read through many of the sticky notes.  There were times when I had to remove a sticky note or two because the analogy wasn't quite aligned.  Again, it was entertaining to see what the students wrote to complete each analogy.

Do you have any fun analogy activities that you and your students enjoy doing?  Please share them!  Also, check out my analogies anchor chart by clicking HERE. Finally, feel free to take a look at my Analogies PowerPoint.
Analogies PowerPoint- includes 46 slides (over 30 practice slides: fill-in-the-blank & multiple choice format)


Alliteration Anchor Chart (plus a free worksheet!)

Monday, February 2, 2015
I always look forward to lessons that include a fun read-aloud. This alliteration lesson is among my favorites because it includes an entertaining book by one of my favorite picture book authors, Margie Palatini. I became a huge fan of Margie Palatini more than twenty years ago when I read Piggie Pie to my first group of second graders, and I have enjoyed every book that she has written since. When I pick up one of her books, I know I will laugh out loud!

Margie Palatini has two books that contain lots of alliteration, so I always use at least one of these when I introduce this topic. (Amazon affiliate links follow.) One of the books is called Moosetache and the other is pictured below. 


After reading the book aloud once for pure enjoyment, we return to the beginning and reread it while listening for alliteration. I record alliterative sentences from the book on an anchor chart. This is what the finished anchor chart looks like.


Alliteration Anchor Chart- This anchor chart helps students understand that it's not the first letter of each word that matters... it's the SOUND that is important!


Tips About Teaching Alliteration

Alliteration seems like a pretty simple concept, right? That was my assumption before I taught this skill for the first time. For the most part, students do seem to learn it quickly. However, I have noticed three areas that sometimes confuse students. Below, I have listed three rules that I emphasize when teaching alliteration.

#1- Two words is enough to make a phrase alliterative.


Yes, Leah licked a luscious lemon lollipop is alliterative.  But A caravan of camels was seen in the distance is also alliterative.


#2-  The words have to be near each other.  

Steph drove to Walmart to buy a new stereo is not alliterative.  There are too many words between Steph and stereo to make that sentence alliterative.


#3-  The beginning sounds are the same, not the beginning letters.

Unfortunately, the photograph was fuzzy is alliterative, but They found a green gem is not alliterative.


Click on the image below to download this FREE practice worksheet.


Thanks for stopping by!

~Deb

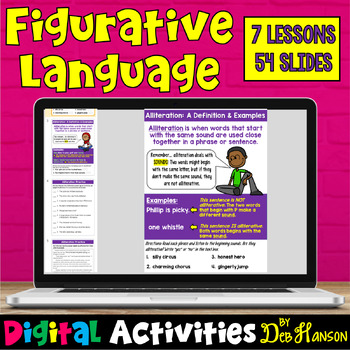
If you are looking for additional figurative language lessons, feel free to check out these digital lessons. They include both teaching slides and practice slides. Lessons focus on similes, metaphors, alliteration, onomatopoeias, personification, hyperboles, and idioms.


Powered by Blogger.
Back to Top